Our Family Motto
We, the Peterson Family:
Promise to be honest in all we do and say,
Stand tall and righteous throughout each day.
Serve around the world and in our home,
Give thanks for blessings we’ve been shown.
We’ll work as a team with joy and love,
And honor our Heavenly Father above.
Sunday, October 31, 2010
Peter Peter Pumpkin Eater
Supplies:
Orange construction paper
Another sheet of paper any color
Pictures of men and women
Glue
Scissors
Directions:
Cut out a large pumpkin shape that will fit on a 8x11 piece of construction
paper. Cut a window shape in it. Have the children find pictures in a magazine or catalog of a man and a woman to represent Peter and his wife. Glue the lady inside the pumpkin looking out the window and glue the pumpkin on the other sheet of construction paper then glue Peter on the side of the pumpkin. I then add the words of the nursery rhyme on the page also. You can do several other pages of different nursery rhymes and make a book for the children. They like it when they can take it home to read it to Mom and or Dad
Twinkle Stars
Old King Cole Crowns
Supplies:
Heavy paper
Collage materials
Scissors
Glue
Directions:
Cut crown shapes out of heavy paper. Have a wide variety of materials available for decoration. ( buttons, lace, paper, tissue paper, macaroni) Let the children glue the collage material to the crown. When it dries staple to fit the child's head.
Humpty Dumpty
Supplies:
Red paper
White paper
Scissors
Glue
Crayons or markers
Directions:
Trace an oval and get the kids to cut it out. On a bottom of a piece of construction paper, get the children to tear some red construction paper to look like bricks and glue it on the bottom. Get the kids to draw facial features on the oval. Glue the oval on top of the brick wall. For legs, I used strips of construction paper folded accordion style.
Week 44: Nursery Rhymes
*Suggested Reading*
Sylvia Long's Mother Goose by Sylvia Long
Mary Engelbreit's Mother Goose: One Hundred Best-Loved Verses by Mary Engelbreit
My Very First Mother Goose by Iona Opie
The Real Mother Goose by Blanche Fisher Wright
New Adventures Of Mother Goose The by Bruce Lansky
Items needed this week:
Orange construction paper
Another sheet of paper any color
Pictures of men and women
Star shape
Glue
Sparkles
Hole punchers
Yarn
Heavy paper
Collage materials
Scissors
Red paper
White paper
Crayons or markers
Monday, October 25, 2010
Paper Bag Masks
Supplies:
Paper Grocery Bag
Crayons
Markers
Scissors
Glue
Directions:
Very simple or very elaborate masks can be made from grocery bags. Start with crayons, markers, scissors and glue, and let your imagination go wild.
*** Please don’t forget to go to the Pumpkin Patch and get pumpkins to carve this week! Roast the pumpkin seeds too!***
Spaghetti Cobwebs
Cooked spaghetti (cold)
White glue
Waxed paper
Directions:
Have the children dip the spaghetti into the glue and arrange the pieces onto the waxed paper. When the spaghetti dries, carefully peel the "cobweb" off the waxed paper. Hang from the ceiling.
Halloween Witch
Supplies:
• Paper plate
• Orange yarn
• Green paint
• Paint brush
• Scissors
• Black construction paper
• Item for nose
• Glue or glue stick
Directions:
1. Paint the backside of your paper plate green. Let dry before proceeding.
2. Punch two holes on sides of rim, slightly above center to hold yarn for hair.
If you have a hole punch this works well.
3. Cut ten 12 " lengths of yarn for each side of the head. Cut two 6" pieces of yarn and then tie each group of 10 yarns together, at the center. Using the 6 " piece, now thread through hole on side of head and tie in place. Repeat for other side.
4. Cut a triangle shape for the witch's hat. Glue in place.
5. Draw eyes and mouth with the black marker.
6. Glue nose in place.
We used one of those peanuts for packing material for our nose but you could just scrunch up a tiny bit of paper and tape with masking tape to make a nose.
Footprint Ghosts
Supplies:
White paint
Black paper
Markers
Directions:
Paint each child's foot with white paint and print it on a black sheet of construction paper. When it dries add eyes to the heel part of the foot. That will be the ghost's
Week 43: Happy Halloween
*Suggested Reading*
Big Pumpkin by Erica Silverman
Bugs That Go Bump in the Night by David A. Carter
Halloween Night by Arden Druce
Halloween Sky Ride by Elizabeth Spurr
Haunted Castle on Hallows Eve by Mary Pope Osborne
Items needed this week:
Paper Grocery BagCrayons
Markers
Scissors
Cooked spaghetti (cold)
White glue
Waxed paper
White paint
Black paper
Clear plastic gloves
Candy corn or Hot Tamales candyPopcorn
Orange and black ribbon
Plastic spider rings
Paper plate
Orange yarn
Green paint
Paint brushScissors
Black construction paper
Item for nose
Snack Suggestion: Halloween Treat Bags
• Clear plastic gloves
• Candy corn or Hot Tamales candy
• Popcorn
• Orange and black ribbon
• Plastic spider rings
Directions:
1. Stuff a piece of candy corn in each finger of the clear plastic glove to resemble fingernails. If you wish, you can use the Hot Tamales candy instead to resemble painted fingernails.
2. Fill it with popcorn (no butter!).
3. Tie it at the wrist with orange and black ribbon.
4. Place a plastic spider ring on one of the fingers.
Monday, October 18, 2010
Go to the Zoo!
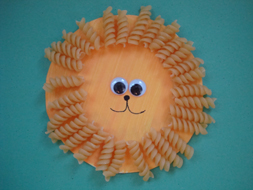
Macaroni Lion
Supplies
• Rotini (spiral pasta)
• Paper plate or sturdy paper
• Paint and brush (if you're using a paper plate)
• Glue
• Black marker
• Google eyes (optional)
Directions:
1. Cut a circle from a paper plate or sturdy paper. If you are using a paper plate you will need to paint it yellow, make sure you paint the back of the paper plate (the eating side usually has a coating on it the makes it hard to paint on).
2. Glue your spiral macaroni all around the outside of your circle to make your lion's mane.
3. Once you have your mane glued on, add some eyes, nose and mouth!
Play-Dough Animals
Supplies:
Animal Cookies
Green play dough
Paper plate
Strawberry basket
Glue
Green tissue paper
Directions:
Purchase zoo animal cookies. Have children place three small blobs of green play-dough onto the middle part of a paper plate. Stand 3 different animal cookies into the blobs so they are facing outward. Then take a plastic strawberry basket and put it over top...it looks like the animals are in cages! I traced the square for the basket with a pencil and put a few drops of white glue there so the basket wouldn't fall off. The kids thought this was great. Then you can glue small strips of green tissue paper on the outer edges of the plate to look like grass.
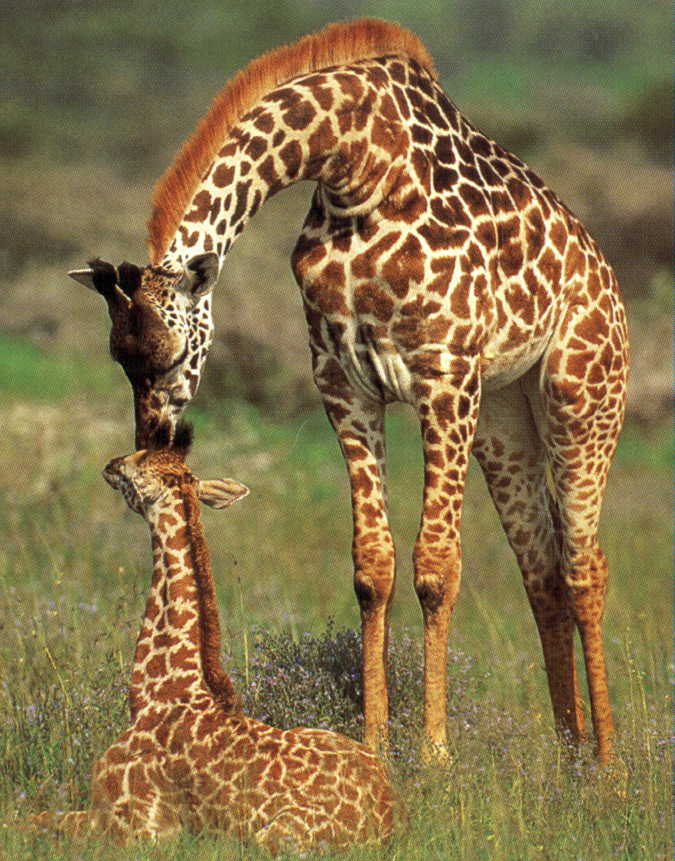
Sponge Paint Giraffe Spots
Supplies:
Orange paper in the shape of a giraffe
Black paint
Small sponges or cotton balls
Clothes pegs
Styrofoam meat tray
Directions:
Use the clothes pegs as handles and attach a cotton ball or sponge to the
end. Put the paint on a Styrofoam meat tray and using the cotton ball/sponge to dip into paint and dab spots onto the giraffe.
Week 42: Animals
*Suggested Reading*
Starry Safari by Linda Ashman
Eric Carle's Animals Animals by Laura Whipple (Compiler), Eric Carle (Illustrator)
If You Give a Moose a Muffin by Laura Numeroff, Felicia Bond
We're Going on a Bear Hunt by Helen Oxenbury, Michael Rosen
Who Hops? By Katie Davis
Items needed this week:
Rotini (spiral pasta)
Paper plate or sturdy paper
Paint and brush (if you're using a paper plate)
Glue
Black marker
Google eyes (optional)
Green play dough
Strawberry basket
Green tissue paper
Orange paper in the shape of a giraffe
Black paint
Small sponges or cotton balls
Clothes pegs
Styrofoam meat tray
Construction paper
Scissors
Pencil
Animal crackers
Snack Suggestion: Safari Collage
Supplies:
• Construction paper
• Scissors
• Pencil
• Glue
• Animal crackers
Directions:
1. Cut a strip of brown paper and glue or tape it onto a full piece of sky blue paper.
2. Now you need to make your sun and tree. We made our tree with two hand prints we cut out of green construction paper, and a brown trunk and yellow sun. You can make these any way you choose; you can use paint, markers, crayons or paper.
3. Now glue on your animal crackers to complete your scene!
Monday, October 11, 2010
Shooting Stars
Supplies:
Coffee (or formula) can
White paint
Marble
Black Paper
Tape
Star Stickers
Directions:
Cover the inside of your coffee (or formula) can with black paper. Have your child dip a marble into white paint, put it in the can, place the lid on the can, and then roll the marble around. Pull the paper out, glue star stickers randomly and it looks like shooting stars.
Flying Saucer
Supplies:
• two paper plates, preferably deep ones
• a plastic 'frappuccino' lid (Slurpie, Yogurtland…)
• stapler
• white glue
• aluminum foil
• colorful beads
Directions:
1. Glue on the plastic lid to the bottom of one of the paper plates and allow it to dry overnight. Then staple together the two plates.
2. Decorate as desired. We used scrunched up balls of aluminum foil and lots of beads.
3. Not bad for a couple of paper plates. I think these UFOs would look great decorated with glow in the dark stickers and suspended from the ceiling!
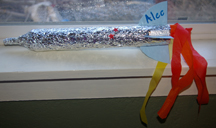
Paper tube space rocket
Supplies:
1 paper towel tube
2 aluminum foil
3 cardstock or poster board
4 tissue paper or crepe paper in red, orange and yellow
5 foil star stickers
6 tape
7 Scissors.
Directions:
Wrap entire tube in aluminum foil, leaving about 3 inches loose at the top. Tape to secure. Form top into point. Use scissors (adult job) to cut 4 evenly spaced notches about 2 1/2 inches from bottom of foil-covered tube. Cut circle about 5 inches in diameter and cut in half. Insert into slots (you’ll also need to cut on of the half circles partway up from the flat edge.) Use tape to secure. Cut streamers about 3/4 inch wide by 10 inches long and tape inside bottom of rocket.
Seltzer Rockets
What you'll need:
- Film canister with snap on lid (Fuji)
- Toilet paper roll (double roll size, preferred)
- Construction paper
- Scissors
- Scotch tape
- Markers, crayons, or paints
- Stickers, optional
- Alka-Seltzer tablets (generic works fine)
- Water in a container
- Eye protection (glasses)
How to make it:
1. Cut straight up the side of the toilet paper roll.
2. Insert the film canister at one end, making sure the end with the lid sticks out about 1/8".
3. Tape along one edge of the toilet paper roll onto the film canister. Roll the toilet paper roll around the canister and tape tightly into place.
4. Cut a circle out of construction paper, cutting a pie shaped wedge out of the circle. Experiment with different sizes of circles to see if it makes a difference in how the rocket reacts upon launch.
5. Roll the paper into a cone shape and tape onto the other end of the toilet paper tube.
6. Decorate your rocket with markers, stickers, crayons, or paints.
7. Cut four squares out of construction paper to make fins if you wish. Tape on to lower sides of rocket.
8. Take outside: the rocket, water, Alka-Seltzer tablets, and eye protection.
9. Put on your eye protection.
10. Turn the rocket upside down, remove the lid from the canister, and fill 1/4 full with water. Drop in tablet and immediately replace lid and set on ground. Back up!
Tips:
Experiment with using one or two tablets into the canister to see if it will shoot up higher. Be sure to look for the tablets after the rocket fires, we were able to reuse some of them a couple of times. Be sure to rinse off your driveway or sidewalk after finishing with your rockets.
Waxtex waxed paper rolls appear to fit the film canisters, without having to cut them. Check any other type of rolled products you may have on hand, you may find another one that fits even better!
Week 41: Outer Space
*Suggested Reading*
Me and My Place in Space (Dragonfly Books) by Joan Sweeney
Jimmy Zangwow's Out-of-This-World Moon-Pie Adventure by Tony DiTerlizzi
ALISTAIR IN OUTER SPACE by Marilyn Sadler
Zoom! Zoom! Zoom! I'm off to the Moon, by Dan Yaccarino
I Want to Be an Astronaut by Byron Barton
Items needed this week:
Coffee (or formula) can
White paint
Marble
Black Paper
Tape
Star Stickers
two paper plates, preferably deep ones
a plastic 'frappuccino' lid (Slurpie, Yogurtland…)
stapler
white glue
aluminum foil
colorful beads
Paper towel tube
Aluminum foil
Cardstock or poster board
Tissue paper or crepe paper in red, orange and yellow
Foil star stickers
Scissors
Film canister with snap on lid (Fuji)
Toilet paper roll (double roll size, preferred)
Construction paper
Markers, crayons, or paints
Stickers, optional
Alka-Seltzer tablets (generic works fine)
Water in a container
Eye protection (glasses)
Preparations to be made:
Don’t forget to go outside and check out the stars this week! Notice the moon in the sky, too!
Monday, October 4, 2010
Going Bananas
Ingredients:
3 1/4 cup butter
4 3/4 cup brown sugar
5 1 egg
6 1 teaspoon vanilla
7 1/2 cup sour cream
8 3/4 cup mashed bananas
9 1/2 cup crushed walnuts
10 1/2 cup flour
11 1/2 teaspoon baking soda
12 1/4 teaspoon salt
13 1/2 teaspoon cinnamon or powdered cloves
14 2 teaspoons cinnamon-sugar
Directions:
You will need a large bowl, a square glass pan, a knife, a masher, a fork, a measuring cup and spoons.
1. In the glass bowl, mix the butter, sugar and egg until it is creamy and smooth. NO LUMPS!
2. Stir in the sour cream and vanilla.
3. Add the mashed bananas and mix well.
4. Add the rest of the ingredients but save the 2 teaspoons of cinnamon-sugar.
5. Mix it all until you have a nice thick mixture. It should look like cookie dough.
6. Place the mixture in the square pan.
7. Cook for 5-6 minutes at Full Power.
8. Dust the top lightly with the cinnamon-sugar.
Mac-n-Cheese
Ingredients:
2 c. macaroni
2 tsp. salt
8 oz. Velveeta cheese (cut in sm. pieces)
2 1/2 c. milk
Pepper to taste
Butter
Directions:
Cook the macaroni in boiling salted water until almost tender (10-12 minutes). (I add a teaspoon of Mazola to water while cooking.) Drain.
Place macaroni in a 9x13x2 inch baking dish or pan. Add the milk, cheese, and dot with butter. Place in a moderate oven (325-350 degrees). Bake for approximately 30 minutes, or until it begins to brown on top.
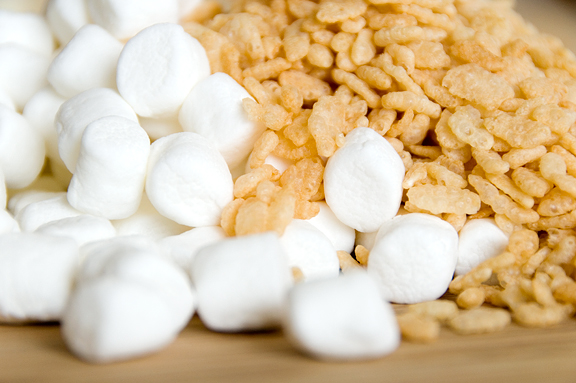
Rice Crispy Treats
Ingredients:
1 bag miniature marshmallows
1 tablespoon butter
2 cups Kellogg's Rice Crispy Cereal
Directions:
Melt butter in a saucepan. Add marshmallows.
Stir until mixture is completely melted.
Remove from heat.
Mix in the Rice Crispy Cereal and stir.
Butter a pan (a square pan like a brownie pan) and spread mixture evenly in the pan. Allow to cool and cut into squares.
Pizza
First, make your dough. Don’t be afraid of making your own dough. My recipe only uses 5 ingredients and you do not have to be a pro at making bread to make this simple dough. If you don’t have time to make your own dough, you can pick up dough from many pizzerias or even your local grocery store.
Ingredients for Dough:
1 1/2 cups warm water
1 Tablespoon yeast
A touch of sugar
3 1/2 to 4 C. flour
1 tsp. salt
1/3 C. sugar
Other Ingredients:
Tomato Sauce
Cheese
Desired Toppings
Directions:
Mix water, yeast and the touch of sugar, set aside and let sit. In another bowl mix together 3 1/2 C. flour, salt and 1/3 C. sugar. Mix the water mixture and flour mixture together. Add more flour if the dough is too sticky (I usually need to add another half cup, making the total 4 cups). Knead the dough until it comes together.
Cover the dough and let it raise for about 30 minutes or longer if you have time.
Gather your toppings. We like a lot of different kinds of pizza but we usually use what I already have on hand. Some of our favorites are ham and pineapple (we use the same ham we use for our sandwiches), pineapple and onion, sausage and mushrooms, BBQ chicken and garlic chicken. You will also need cheese. I like to use mozzarella with just a bit of cheddar added in.
Make your sauce. Of course you can buy pre-made sauce, but making your own is quite simple. I just warm a can of tomato sauce on the stove top and add spices. I use garlic powder, some salt, basil and oregano.
Today I made garlic chicken pizza and BBQ chicken pizza. For the garlic sauce, I put 1 Tbsp. butter and 3-4 garlic cloves that I chopped into a bowl. Place it in the microwave for just a few seconds, then add some salt. For the BBQ chicken pizza, I just use bottled BBQ sauce.
Shape your dough and place on pans. We only have one pizza sheet. For the other pizzas I use my cookie sheets, they work just as well. Be sure and spray your cookie sheets with PAM. If you are having a hard time getting the dough to stretch, just give it a minute to rest.
Prick your dough with a fork. This will help reduce any big bubbles.
Spread your sauce. Leave some room for your crust.
Sprinkle a light layer of cheese over the sauce.
Spread your toppings. We’re using chicken and red onions today.
Sprinkle with more cheese. I also like to sprinkle a little basil on top.
Bake. I put mine in a cold oven and turn it to 400 degrees. I bake it until the cheese is brown and bubbly, or about 15-20 minutes. Just keep an eye on it and see how it goes.
Week 40: Cooking
Items needed this week:
1/4 cup butter
3/4 cup brown sugar
1 egg teaspoon vanilla
1/2 cup sour cream
3/4 cup mashed bananas
1/2 cup crushed walnuts
1/2 cup flour
1/2 teaspoon baking soda
1/4 teaspoon salt
1/2 teaspoon cinnamon or powdered cloves
3 teaspoons cinnamon-sugar
2 c. macaroni
2 tsp. salt
8 oz. Velveeta cheese (cut in sm. pieces)
2 1/2 c. milk
Pepper to taste
Butter
1 bag miniature marshmallows
1 tablespoon butter
2 cups Kellogg's Rice Crispy Cereal
Tomato Sauce
Cheese
Desired Toppings
1 1/2 cups warm water
1 Tablespoon yeast
A touch of sugar
3 1/2 to 4 C. flour
1 tsp. salt
1/3 C. sugar
Preparations to be made: The goal for this week is to get the kids in the kitchen with you. Let them help as much as possible. Set aside extra time for dinner prep so that they can share that time with you. Strap on that apron and have fun! Don’t forget to wash hands!