Our Family Motto

We, the Peterson Family:

Promise to be honest in all we do and say,

Stand tall and righteous throughout each day.

Serve around the world and in our home,

Give thanks for blessings we’ve been shown.

We’ll work as a team with joy and love,

And honor our Heavenly Father above.

Sunday, September 26, 2010

Oobleck


Supplies:
Cornstarch
Water
Bowls

Directions:

1. Show children a rock and a glass of water
o How are these two different?

2. Explain that the water is a liquid and a rock is a solid.

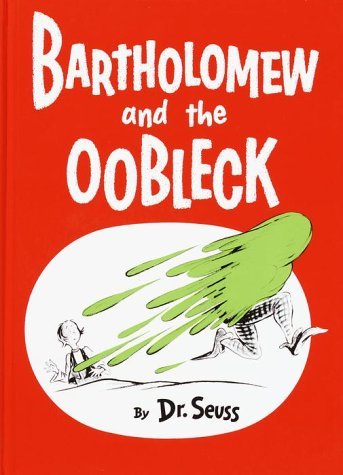
3. Read: Bartholomew and the Oobleck by Dr. Seuss and have the children predict from the cover of the book what oobleck could be.

4. Write predictions on a chart.

5. Tell children we are going to experiment to see who is right.

6. Allow children to mix cornstarch and water together ( 2 parts cornstarch to 1 part water)

7. Let children play with the Oobleck to get a good sense of what it may be.

o Is oobleck a liquid or a solid?
o What makes you think so?

Felt Toy Monster


Supplies:

Felt
Needle and embroidery thread
Toy stuffing
Fabric glue
Wiggle eyes/gems/sequins/scraps of felt/fabric paint – whatever you can find to decorate your monster

Instructions:

Cut two monster shapes from felt. Sew them together around the edge using running stitch. Leave a small gap to stuff the toy.

When the toy is full, sew up the gap.
Glue on buttons and ribbons and anything else you have in your craft box to make your monster look really scary.

Plant Pals


Supplies:

• One 9- or 12-ounce plastic cup
• 1 to 1 1/4 cups of potting soil
1 1 tablespoon of grass seeds (we bought rye grass at a garden center)
2 Decorations, such as office dot stickers, markers, and ribbon (for safety, it should measure less than 6 inches long)


Directions:

1. Fill the cup halfway with soil. Divide the remaining soil in two, then have your child measure the seeds and stir them into one of these halves. Tip: To speed germination, you can first soak the seeds in water overnight.

2. Spoon the seed-filled soil into the cup, then top it with the remaining soil (this final layer should be about 1/8 to 1/4 inch deep). Water the soil well.

3. Let your child decorate the cup with stickers and markers. Finally, leave the plant in a warm, sunny spot to sprout. Water as necessary to keep the soil about as wet as a damp sponge.

A Trail Tote


Supplies:
• Egg carton
• Magnifying glass
• Magnets
• Water-filled spray bottle
• Homemade soil slides

Directions:

1. Egg carton: Paint the bottom of each compartment a different color, then challenge kids to find natural souvenirs in a matching hue.

2. Magnifying glass: Encourage your family to take a closer look at things and discover treasures hidden in plain view, such as the silvery veins on a leaf or tiny mites on a decaying log.

3. Magnets: Run a strong magnet across the soil to see if iron bits are lurking about (they'll stick to the magnet). For an even greater wow factor, bring a paper plate, top it with soil, then run a magnet underneath it to make the iron bits dance.

4. Water-filled spray bottle: See how a gentle spritz can change the look of things, such as spiderwebs and color-shifting rocks.

5. Homemade soil slides: Cut a 1/2-inch square in a notecard and cover the hole with a piece of clear tape. Press the sticky side against soil, then use a magnifying glass to discover its individual components.

Week 39: Get Crafty!


*Suggested Reading*
(Fun reading list)
Bartholomew and the Oobleck by Dr. Seuss
I Know a Rhino By Charles Fuge
Baby Beluga By Raffi, illustrated by Ashley Wolff
A Pocket for Corduroy By Don Freeman
Where the Wild Things Are By Maurice Sendak


Items needed this week:
Cornstarch
Water
Bowls
Felt
Needle and embroidery thread
Toy stuffing
Fabric glue
Wiggle eyes/gems/sequins/scraps of felt/fabric paint – whatever you can find to decorate your monster
One 9- or 12-ounce plastic cup
One to 1 1/4 cups of potting soil
One tablespoon of grass seeds (we bought rye grass at a garden center)
Decorations, such as office dot stickers, markers, and ribbon (for safety, it should measure less than 6 inches long)
Egg carton
Magnifying glass
Magnets
Water-filled spray bottle
Homemade soil slides

Monday, September 20, 2010

Leaves!


Take a leisurely stroll with your child through the park, or down the street, wherever you might find leaves as they fall in Autumn. Take along a bag and collect some nice leaves. Different sizes, types and shapes make for a nice collection.
When you get home, make a couple toasty cups of hot chocolate and warm up after being out in the cool, crisp autumn air!

Supplies:
Your leaf collection
Washable glue
Crayons, we used fall colors: red, green, yellow, orange and brown
note: use old, broken ones, they need to be peeled. I found the darker colors worked out best.
Sheets of regular white paper
Paperclips to hold the sheets together

-Lightly glue the leaves on one piece of paper. The glue is basically just to hold them still, so there doesn't need to be a lot of glue, just enough so they won't slide around. you will get the best results if you glue the leaves upside down, so that the veins of the leaves are facing up.

-Give the glue a few minutes to dry (longer if the glue is outside of the leaves), then place another clean sheet of white paper on top of the first one. You may want to hold the edges together with a few paper clips just to keep them from sliding around.

-Then, you can advise your child that the time to color is here!! They do not need to stay in any lines, just color all over the paper with one, two or more colors until the page is all colored. Be sure to have them color with the crayons on their sides so that the outlines of the leaves show up the best.

-When your child has finished coloring the masterpiece, pull the paperclips off, and you can use magnets to display it on the fridge, frame it or place it in a scrap book. Be sure to add your child's name and a date to the artwork, so that you will know when it was made and by whom. (These photos here do not really show the definition you can get with this method, but gives the general idea.)

Gourd Heads


Here's a project where the kids can just go crazy with any supplies you have.

Supplies:
• Small Gourds

• Misc. supplies such as:

Yarn, Ribbon, Lace, Wiggle Eyes, Pompoms, Gemstones, Pipe Cleaners, Craft Foam Scraps

• Tacky Glue

• Small Disposable Cups (to keep some gourds upright)


Instructions:

Anything goes here. Just let the kids create.

Fruit & Veggie Stamp Friends


What you'll need:
• Carrots, apples, and yellow squash
• Paint: red, yellow, orange, light blue, green and white
• Paintbrush
• Black marker
• Art paper

How to make it:
1. Have an adult slice the vegetables and fruits in half lengthwise.

2. Dry off the cut sides by blotting them with a paper towel.

3. Paint each cut side with a generous amount of paint.

4. Press painted side on to paper and remove. Do this for as many veggie and fruit stamps you want.

5. Draw eyes, mouths, arms and legs with black marker.

6. Dip a dry paintbrush in green paint, dab off excess on paper towels. Paint grass on paper.

7. Use same dry brush method when using the light blue paint for the sky.

8. Dip a clean paint brush into white paint, but don’t dry off on paper towel. Lightly dab the paintbrush onto the paper to create clouds.


Tips:
• Fall brings plenty of fun shaped squash and gourds. Try different types of gourds, miniature pumpkins, and squash with this project.

• Apples make great caterpillars! Stamp the vegetable onto the paper horizontally and add as many legs as you like.

• Alter this project to spring by using apples and carrots and bright colors such as pink, yellow, and bright orange.

Fall Fingerprint Tree Craft


What you'll need:
• White construction paper or card stock
• Orange construction paper
• Scissors
• Acrylic or poster paint in green, brown, orange, yellow, tan and red
• White craft glue

How to make it:
1. Line work surface with newspaper and place white construction paper in the center.
2. Start by showing the child where you want to place his/her arm on the paper, you will be painting the bottom of the forearm, palm and all fingers.
3. Use brown paint to cover bottom of forearm, palm and all fingers, use a generous amount.
4. Help child carefully lay their arm and fingers down on the paper, fingers extended. Hand should go in the center of the paper to allow room for the leaves. Gently press down and roll each finger, palm and arm onto the paper. Lift arm straight up into the air.
5. Wash paint off arm and hand and dry completely.
6. Place a nickel sized amount of each color paint into a paper plate. Have child dip their finger into the paint and onto the paper creating leaves of all different colors. The fingers on the paper are the branches, so put the leaves at the end of the branches and all around them.
7. Use a paint brush to add some grass at the bottom of the tree.
8. For older kids, add a few flowers in the grass. Use a small dot of paint on their finger to create the center and flower petals. You can even add a little squirrel in the tree by dotting on a head, body and tail! Use a black marker to dot on the eye. You can also add a few “falling leaves” by dotting two or three colors falling from the branches and use a marker to add a few squiggly lines indicating motion.
9. Make a frame from the orange construction paper by gluing around the back edge of the picture.

Tips:
• This project has fun variations for Spring as well. Make all the leaves green using two or more shades, then add red dots for apples or white and pink dots for flowers. Use a construction paper color for the frame to match the season.
• It’s best to show children a finished project first so that they understand what they are trying to create. This will make it easier to envision their own picture.
• Be sure to have a bowl of water and some paper towels handy for cleaning off fingers.

Week 38: Welcome Autumn


*Suggested Reading*

Autumn : An Alphabet Acrostic by Steven Schnur
Autumn Leaves by Ken Robbins
Corn Is Maize by Aliki
Johnny Appleseed by Reeve Lindbergh
The Little Scarecrow Boy by Margaret Wise Brown


Items needed this week:

Your leaf collection
Crayons
White Paper
Paperclips
Small Gourds
Misc. supplies such as:
Yarn, Ribbon, Lace, Wiggle Eyes, Pompoms, Gemstones, Pipe Cleaners, Craft Foam Scraps
Tacky Glue
Small Disposable
Carrots, apples, and yellow squash
Paint: red, yellow, orange, light blue, green and white
Paintbrush
Black marker
Art paper
Orange construction paper
Scissors
Acrylic or poster paint in green, brown, orange, yellow, tan and red

Sunday, September 12, 2010

Coloring

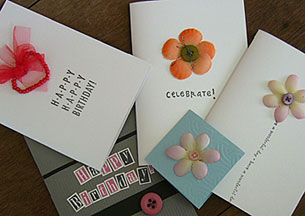
Birthday Cards


Supplies:
Paper
Crayons and Markers
Scissors
Stickers
Glue
Glitter
Any scraps or old card you have around the house

Directions:
Make a few birthday cards to add to your stash. It’s fun and easy and your child will have the perfect card for the next party they go to!

Party Games


Pin the Tail on the Donkey


1. Print out the donkey.
2. Mount the donkey image on a vertical surface, such as a wall.
3. Blindfold one player.
4. Spin the blindfolded player in circles for a few seconds until they get a bit dizzy and lose their sense of direction.
5. Have the blindfolded player try place to pin their donkey tail on the end of the donkey, trying to remember where the donkey was hanging. When they place the tail, remove their blindfold.
6. Allow the second player to take a turn. Leave all the donkey tails wherever they had been placed, until all players have had a chance.
7. Determine the winner. The winner is the player who placed their tail closest to the correct spot on the donkey (often marked with a target or "x").


Ring Around the Rosey

Step 1
Gather at least 2 kids together, or, ideally, 3 or 4. If too many kids try to play at once, it's more likely that someone will fall down too soon.
Step 2
Explain the game rules to the participants and teach them the short song. The kids should understand the object is to sit down after the singing is completed.
Step 3
Form a circle with the kids and yourself by join hands with each other.
Step 4
Walk around in a circle while singing this song together: “Ring around the Rosie, a pocket full of posies, ashes, ashes, we all fall down."
Step 5
Stop walking and quickly sit down on the word "down."

Simon Says
Step 1
Line up the group across from you, 10 to 20 feet away.
Step 2
Tell the players that they should all obey you if you first say the words "Simon says."
Step 3
Tell them that they are out of the game if they follow an order that doesn't begin with "Simon says," or if they fail to do what Simon says to do.
Step 4
Begin by saying something like, "Simon says, put your hands on your head."
Step 5
Look to make sure everybody has put their hands on their heads.
Step 6
Give another order such as, "Simon says, stand on one foot." Check again.
Step 7
Continue giving orders. Mix it up and say something like, "Raise your right hand," without the preface "Simon says."
Step 8
Call out the players who raise their hands.
Step 9
Play until one person is left. This is the winner.
Step 10
Let that person give the commands for the next round.

Birthday Cake (or cupcakes)


Supplies:
Cake mix
Frosting
Candy
Candles

Directions:
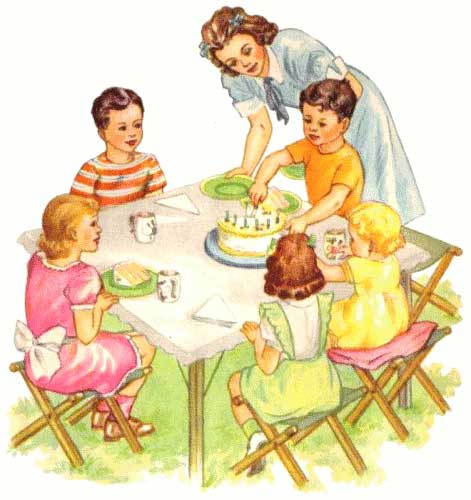
Get a cake mix and frosting from the store or make your own! (It’s up to you) If you get white frosting you can die it different colors. Let your child get involved. Ask them what colors they want and what kinds of candies would go on top. Let them help you mix and pour and keep an eye on the timer too! When they are all done stick a candle in one and blow it out as your sing Happy Birthday! (Or Happy Un-birthday)

Week 37: Birthdays


*Suggested Reading*

Where Is Baby's Birthday Cake? by Karen Katz
Clifford's Birthday Party by Norman Bridwell
Little Miss Birthday by Roger Hargreaves
Henry and Mudge and the Best Day of All (Henry and Mudge Series #14) by Cynthia Rylant
Piper Reed Gets a Job by Kimberly Willis Holt


Items needed this week:

Paper
Crayons and Markers
Scissors
Stickers
Glue
Glitter
Any scraps or old card you have around the house
Cake mix
Frosting
Candy
Candles

Sunday, September 5, 2010

Zip Lock Baggie Photo Album

Supplies:
Zip Lock Baggies
Book Binding Tape
Old Photos or magazines
Scissors

Directions:
Attach the zip lock baggies to each other using the book binding tape, zipper facing outward. Now you have your book! All you have to do is fill it with pictures. You can use pictures of the family, animals, or make it a learning book with educational or religious pictures. It’s easy to change out providing hours of creative fun!

Photo Magnet

Supplies:
Photos
Scissors
Mod Podge
Wooden Disks
Hot Glue
Magnets

Directions:
Cut out photos, glue them on to the wooden discs with Mod Podge, and give the photos a finishing coat of the same stuff. Don’t be alarmed when the stuff goes on white. It dries clear and glossy.
Use hot glue to attach a round magnet to the back.

Photo Place Mat


Supplies:
1 1 piece heavy cardboard (size 8 ½” x 11”)
2 glue
3 family pictures and mementos
4 2 sheets clear contact paper


Directions:
Decorate the cardboard with your pictures, mementos, and any other drawings, poems, or special messages your kids would like to include. When you are finished, place the decorated cardboard between the sheets of clear contact paper.

Photo Shoot

Let your child take the pictures for once! Go outside or set up interesting backgrounds. Let them be creative. What do they want to take pictures of? If you are worried about them handling your camera buy a cheap disposable camera. Get the photos developed and enjoy!

Week 36: Photography


*Suggested Reading*

(Here are some ideas for some fun books!)
The Family Book By Todd Parr

Are You My Mother? By P.D. Eastman
Diary of a Worm By Doreen Cronin, illustrated by Harry Bliss

Walter, the Farting Dog By William Kotzwinkle and Glenn Murray, illustrated by Audrey Colman

I Hope You Dance By Mark D. Sanders and Tia Sillers, illustrated by Buddy Jackson and Karinne Caulkins


Items needed this week:

Zip Lock Baggies
Book Binding Tape
Old Photos or magazines
Scissors
Mod Podge
Wooden Disks
Hot Glue
Magnets
Piece heavy cardboard (size 8 ½” x 11”)
Glue
Family pictures and mementos
2 sheets clear contact paper

Visit a local farm or petting zoo!

Chick Mask AND… Toilet Roll Sheep!!!


Chick Mask

Supplies:
Paper plate
Yellow paint
Orange paper
Glue
Elastic thread

Directions:
Paint the paper plate yellow and leave to dry.
Cut out two eye holes.
From orange paper cut out a triangle for the beak. Glue the beak to the face.
Make a small hole on either side of the mask, thread the elastic thread through and tie to secure.

Toilet Roll Sheep

Supplies:
Toilet Paper Roll
5 corks
Black paint (or a permanent marker pen)
Wiggle eyes
Glue (Hot glue will dry faster)
Cotton balls

Directions:
Color the corks black. We did this with a permanent marker pen but you could paint them instead.

When the corks are dry, glue 4 of them to the toilet paper roll to make legs and leave them to dry. You will probably need to prop up the tube to keep the legs in position while they are drying.

Meanwhile, glue the wiggle eyes to the 5th cork and put to one side.

When the legs are dry, cover the tube in glue and stick on the cotton wool balls.

To cover up the holes at the ends of the tubes you will need to dab glue onto the cotton wool balls and stick them to on to the other balls.

Take the cork with the eyes and dab on some glue. Stick the cork to the cotton wool balls at one end of the tube to form the head.

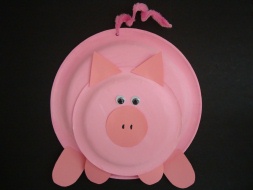
Paper Plate Pig Craft


Materials you will need for the paper plate pig are:

8 paper plates (either dinner size or dessert size),

egg carton cup or empty cream container (nose)

2 tp rolls for dessert size plates or 4 tp rolls for dinner size (legs),

scissors,

tape or glue,

piece of pink paper (or white paper coloring pink),

pink paint and black paint or marker.

OPTIONAL: googly eyes and a pipecleaner.


If you don't have pink paint, cut up 1 inch (ish) squares of pink construction paper or tissue paper and glue those to the paper plates (like mod podging) instead of painting.

We used styrofoam plates as it's what we had in the house. BUT, the paint didn't stick very well and flaked off easily so we couldn't play with the pig *wail*. If I had it all to do again, I'd recommend using paper plates that aren't too glossy on the bottoms.

• OK, before we go further, we're going to get to know our paper plates (so you'll understand the terms I'm using). The paper plates have a BOTTOM (the part you set on the table) and a TOP (the part you put the food on).

• Paint the bottom of the paper plates, egg carton cups and tp rolls pink and let dry.

• Kaitlyn (Age "almost 3" at the time *sob*) had loads of fun painting plates and tp rolls pink and gluing them together.

• I ended up doing the nose, mouth, tail and legs.

• If you're doing this with an older child (4+ ish), try making up a tongue twister to say while you're doing the project (something like "painting pink pig plates" or "please paint the pig plates pink").

• Split your plates into sets of two.

• Glue each set of two together rim to rim (TOP to TOP).

• Glue the bottoms of the 4 sets together so you have a stack of paper plates (see photo). The top plate in the stack will be the face.

• If you're using 2 tp rolls, cut them in half. If you're using 4 tp rolls, look at the dimensions and trim them down a bit if you want to (so the legs are proportionate with the pig).

• Fold your pink paper in half and cut out a triangle (you'll end up with two identical ears). Glue or tape these to the back of the top set of plates. (If you want to get really fancy, you can sandwich the ears between the plates when you're gluing them together rim to rim).

• Draw/paint black nostrils onto the egg cup and glue it to the face.

• Draw/paint black eyes onto the pig, attach googly eyes, or draw eyes on white paper and glue them on.

• Draw/paint a black mouth onto the pig or draw a mouth on white paper and glue it on.
• Once everything is completely dry, squish the top of the tp rolls and slide them between the plates to make 4 legs. Tape or glue.

• Twist a pipecleaner into a piggy tail and poke it through the back plate (use a sharp pencil to make a small starter hole) or take a circle of pink paper and cut it in a spiral and glue it to the back plate.
Box Barn Craft


You can make this cute barn using a cardboard box, scissors, and paint. The barn doors even open and close. If you want to put your toy animals in the barn afterwards, make sure you start out with a box that is the right size for your animals.

This is a really fun project that makes a great toy barn - you can even play with it afterwards. The painting part of the project is a bit messy, so wear old clothes and work on a lot of newspaper. This project requires adult help and supervision (adults should cut the cardboard and supervise the painting).


Supplies:
• A cardboard box (pick the size that will fit your plastic animals)
• A sheet of cardboard (for the roof)
• Pencil or marker
• Scissors or a craft knife (to cut the cardboard)
• Tempera or acrylic paint (red, white, and black)
• Scrap newspaper (to protect the table)


Mark the cardboard box so that it has the roof-line of a barn.

Cut the cardboard along your markings, making a barn shape.

Mark the barn doors (they should be shaped like a rectangle with a vertical line in the center, making a double door). Cut along the top, bottom and middle lines -- the outer vertical lines will be the hinges, creating double doors.

If you put barn doors on both sides of the barn, two children can later put animals in and out of the barn at the same time.


For the roof, cut a rectangle of cardboard that is about an inch or two longer than the barn and wider than the two triangular tops of the barn.
Mark where the fold line will be and then carefully fold the rectangle in half. Place the roof on the barn to make sure that it fits.


Mark where you will want windows on your barn.

Paint the barn red.

When the red paint dries, paint the inside of the windows black. When that paint has dried, paint white trim around the windows and doors. Also paint a large white "X" on the barn doors.

Paint the roof white or light gray.

Place the roof on the barn.

You now have a fantastic barn with a removable roof. You can put your play animals in and around the barn and create a make-believe farm.

Week 35: Good Old Farms


*Suggested Reading*

Cock A Doodle Dudly - Bill Peet
Eggbert - The Slightly Cracked Egg - Tom Ross
Click, Clack, Quackity-Quack: An Alphabetical Adventure by Doreen Cronin
The Little Red Hen (Little Golden Book) by Diane Muldrow
The Flea's Sneeze by Lynn Downey


Items needed this week:

Toilet Paper Roll
5 corks
Black paint (or a permanent marker pen)
Wiggle eyes
Glue (Hot glue will dry faster)
Cotton balls
Paper plate
Yellow paint
Orange paper
Elastic thread
Paper plates (either dinner size or dessert size)
egg carton cup or empty cream container (nose)
2 toiler paper rolls for dessert size plates or 4 toilet paper rolls for dinner size (legs)
Scissors
Tape or glue
Piece of pink paper (or white paper coloring pink),
Pink paint and black paint or marker.
OPTIONAL: googly eyes and a pipecleaner.
A cardboard box (pick the size that will fit your plastic animals)
A sheet of cardboard (for the roof)
Pencil or marker
Scissors or a craft knife (to cut the cardboard)
Tempera or acrylic paint (red, white, and black)
Scrap newspaper (to protect the table)

Egg Carton School Bus


Materials:
• lid (TOP) of an egg carton
• yellow paint or markers
• black construction paper or 2 lids from milk jugs (for wheels)
• black marker
• OPTIONAL: small cutouts of people from magazines, coloring books or hand drawn
Instructions:
• cut the lid off an egg carton

• Paint (or color with marker) the lid yellow. We only used one coat, but you could do two.

• While the paint is drying, cut 2 circles out of black construction paper
o (You can have the children trace the lid from a baby food jar or orange juice container -- preschool kids enjoy tracing). Use white crayon, chalk or pencil crayon for tracing.
o Allow the children to cut out their circles with safety scissors (or supervise them closely while they use regular scissors).
o The wheels don't have to be perfectly round -- let them have fun.
• OR
o use the lids from milk jugs as an alternative to construction paper wheels

• OPTIONAL: Also while the paint is drying, have the children cut small images of people from magazines or coloring books or let them draw their own.
o Once again, let the children roughly cut out the images with safety scissors.

• Once the paint is dry, glue on the wheels.

• OPTIONAL: Glue the images of people onto the bus. The carton we used had holes down the center, so we glued the people into the holes.
o If yours doesn't have holes, just glue the people onto the bus... you can draw "windows" around them with a black marker.

• Write SCHOOL along the top of the bus (or if your child is beginning to write on their own, let them write it out).

Back to School Family Photo Collage


It is common for young children to have some separation anxiety when it comes to beginning preschool. Help your preschooler to create this artful reminder of home for the first days of school. Using family photos and a little bit of imagination, your child can collage a cheerful memento of home.
Not only will the Family Photo Collage aid in the preschool transition, but it can also serve as a great lesson that will enhance your child’s development. Exploring art processes, learning about shape, increasing fine motor skills, and developing awareness of spatial relationships are all important objectives for this project.

What You Need:

• A variety of family photos (include all family members, even pets)
• 1 piece of thick or sturdy paper such as cardboard or poster board
• Glue
• Safety scissors

What to Do:

1. Help your child to search for a variety of family photos. Include all members of the family. Try to find pictures that capture special moments such as birthdays, holidays, or vacations.
2. Have your child arrange the photos on the cardboard or poster board. Choose a size that meets your needs. Instead of purchasing a thick paper, try using the front or back of a cereal or cracker box (if your child is bringing this to school, avoid boxes that once contained nut or dairy based products).
3. If needed, help your child to trim and crop the photos with safety scissors. Discuss what shapes the photos are. Ask questions such as, “Is the picture of Daddy a rectangle or a square?”, or “Can you make a triangle from the picture of Nana?”.
4. Glue the photos to the cardboard or poster board.
5. Set aside to dry.

Extend this activity into the school year. Take a photo of your child on the first day of school and add this in to the collage with the rest of the family!

Back to School Scissor Skills Projects


Materials:
• children's scissors
• construction paper -- you can pre-choose the color or let the kids pick their own
• glue
• paper and printer

Directions:
• ADULT: print template of choice or make your own.

• ADULT: Cut the construction paper into long, one inch wide strips (you can cut fast, they don't have to be perfect)
ex:

• show the child how to hold their scissors

• let the child snip off pieces from the strips of construction paper... as the children get older, you can ask them to try to snip perfect squares, but to begin with, just let them snip away


• Either squeeze the glue onto the template for the child or squeeze some into a margarine container lid and give the child a q-tip or popsicle stick to spread the glue themselves.

• Let the child fill the template with the snipped pieces -- don't worry that they go over the lines

• Let dry

Chalkboard


Even in the age of dry erase boards, there's something to be said about an old-fashioned chalkboard. With a few ingredients from your local hardware store, you can make and decorate your own chalkboard that will add a little pizazz to any playroom. Your kid will love it because she'll get a nifty reusable "canvas" to practice writing, drawing, or math. It's a special treat for children up to third grade!


What You Need:
• Newspaper
• An old picture frame
• thin, smooth board (smooth plywood works well for this)
• Chalkboard brush-on paint (available at hardware or discount stores)
• A paintbrush
• Wood glue
• Paint, any bright color
• An exacto knife or box cutter
• Chalk and a chalk eraser
• Sharpie marker, jewels, stickers, glue (optional)


What to Do:
• Cover your work space with newspaper to avoid any mess.
• Using your box cutter, cut out an appropriate size out of your wood. (ex: 8x10 for an 8x10 frame…)
• In a well ventilated area, use the chalkboard paint to cover the entire piece of wood.
• Let dry for about 3 days
• Decorate your frame with paint, stickers or anything else your child desires!
• Glue the chalk board in the frame
• Before breaking in your new chalkboard, rub it all over with the side of a piece of chalk and erase. Now your child is ready to use it however she pleases! If your child is older, encourage her to use it to practice her spelling words, math equations, and draw silly pictures. Let her pretend she's the teacher, and invite her to teach you what she's been learning in class. It's even great for preschoolers--have your child practice writing the alphabet, numbers, her name, and the date for a head start into kindergarten.

Week 34: Back to School


*Suggested Reading*

First Day Jitters by Julie Danneberg
First Day, Hooray! Nancy Poydar
Franklin Goes to School Paulette Bourgeois
Strawberry Shortcake Goes to School Emily Sollinger
It'S Back To School We Go! Ellen Jackson


Items needed this week:
• Newspaper
• An old picture frame
• thin, smooth board (smooth plywood works well for this
• Chalkboard brush-on paint (available at hardware or discount stores)
• A paintbrush
• Wood glue
• Spraypaint, any bright color
• An exacto knife or box cutter
• Chalk and a chalk eraser
• Sharpie marker, jewels, stickers, glue (optional)
• construction paper -- you can pre-choose the color or let the kids pick their own
• paper and printer
• A variety of family photos (include all family members, even pets)
• 1 piece of thick or sturdy paper such as cardboard or poster board
• Glue
• Safety scissors
• lid (TOP) of an egg carton
• yellow paint or markers
• black construction paper or 2 lids from milk jugs (for wheels)
• black marker
• OPTIONAL: small cutouts of people from magazines, coloring books or hand drawn